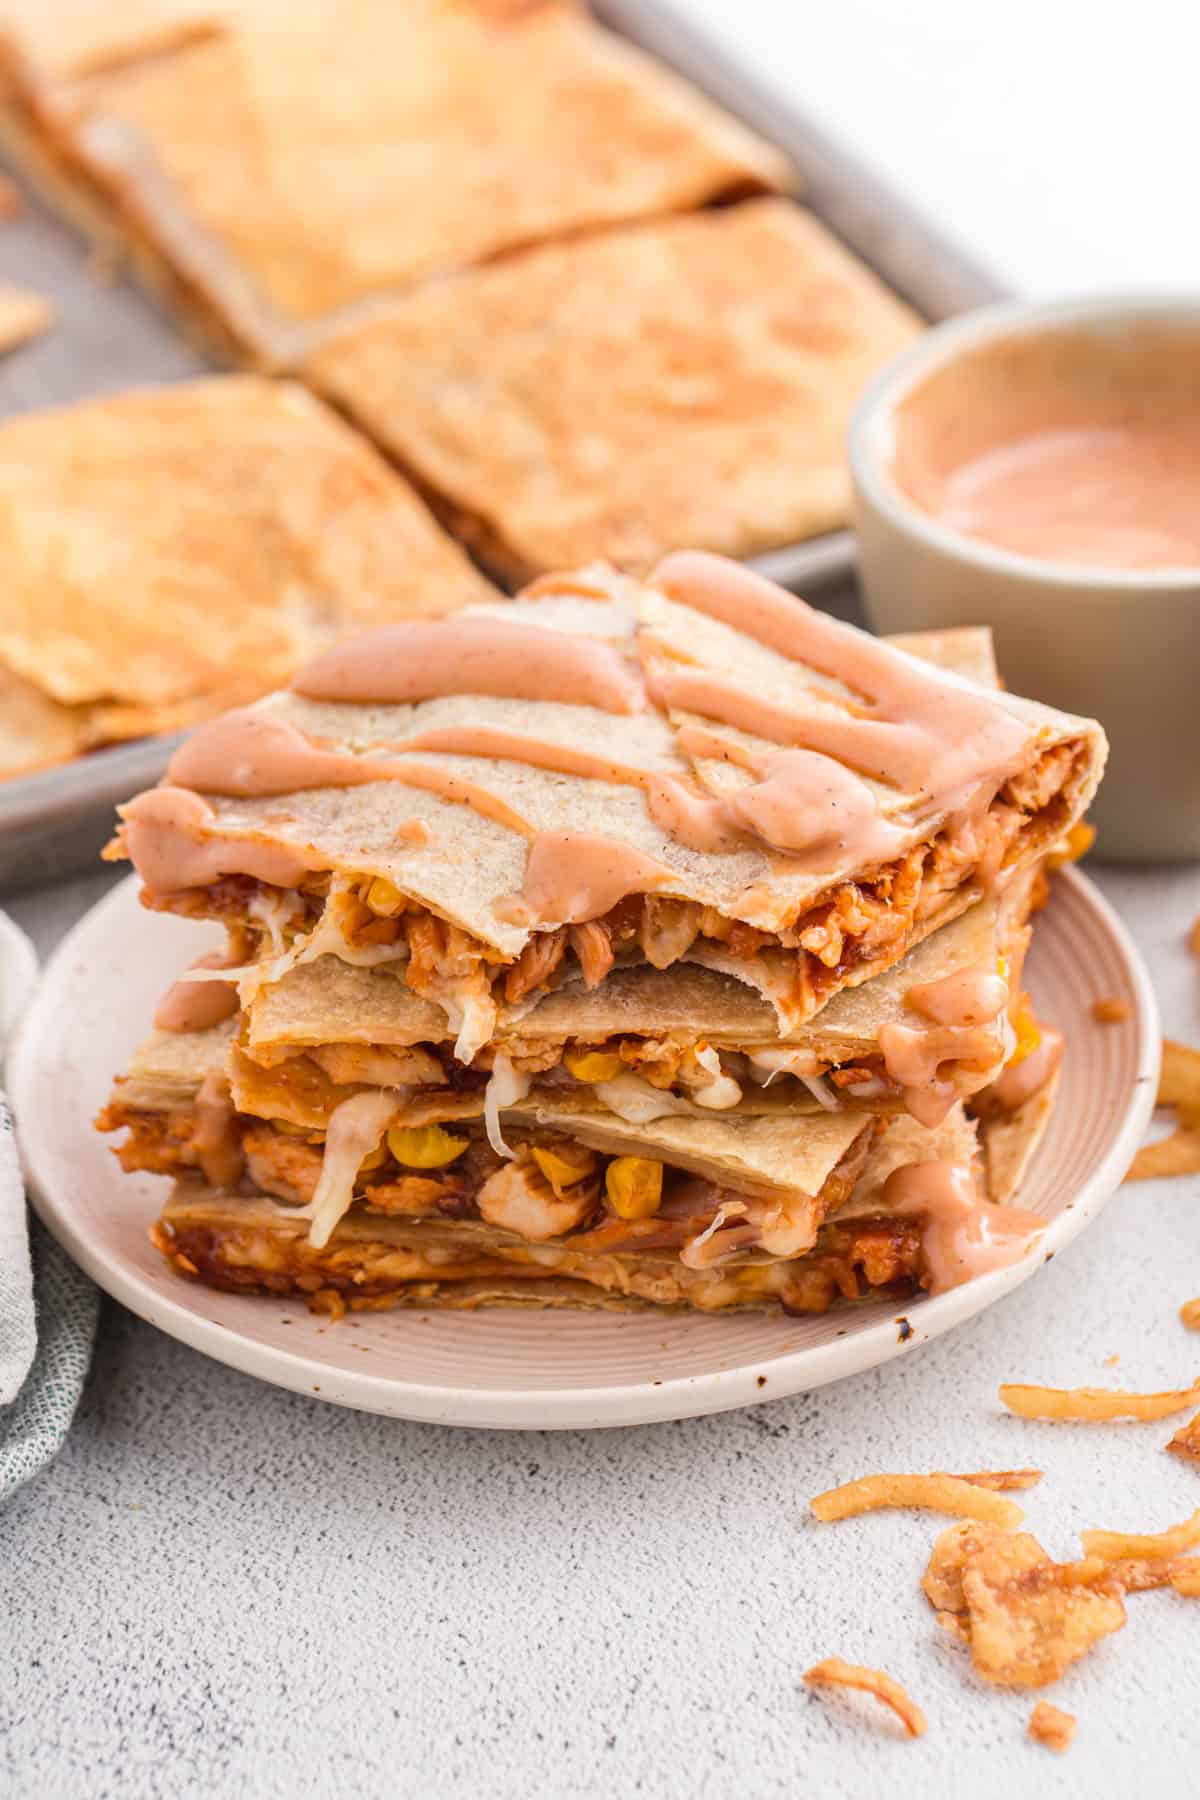
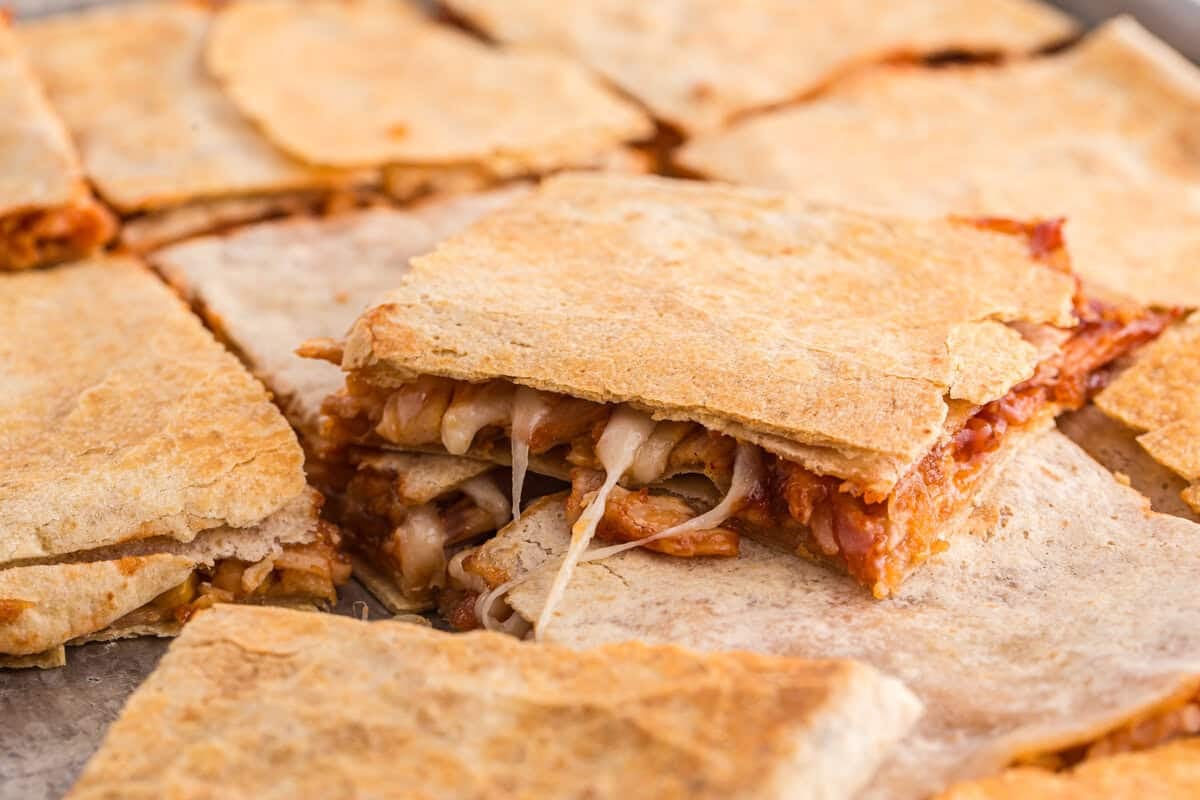
This sheet pan BBQ chicken crunchwrap is everything you want in a weeknight dinner. With a crispy golden tortilla on the outside, smoky BBQ chicken, melty cheese, sweet corn, and a satisfying crunch from French’s crispy fried onions on the inside. The whole thing comes together in about 35 minutes using rotisserie chicken, and instead of folding individual wraps, you layer everything onto one big sheet pan, press it, bake it, and slice it like a pizza. It’s hands-off, mess-free, and genuinely fun to serve.
I’ve made this sheet pan crunchwrap more times than I can count. It’s my go-to on nights when I want something fun without a lot of fuss or when I need to feed hungry sports fans. Rotisserie chicken, BBQ sauce, and a handful of fried onions all come together so fast. My kids get excited every single time, which is really all I need to know. If I have extra time, I’ll swap the rotisserie chicken for crockpot BBQ chicken. The flavor is even smokier and more saucy. After a few test rounds, I figured out what actually makes this recipe work.
My first attempt skipped the second sheet pan, and the wrap puffed up unevenly and lost its crunch. Once I started pressing it down during baking, everything changed. The even pressure gives you a perfectly crispy, golden layer all the way across. No soggy patches, no undercooked spots in the middle. The smoky BBQ chicken and melty Monterey Jack do all the heavy flavor lifting. The crispy fried onions add that little bit of crunch that makes every bite feel complete. It’s simple, it works every time, and it disappears fast. I make this one for busy weeknights, casual get-togethers, or any time I want something a little different that still uses simple everyday ingredients. It’s also a great one for feeding a group without spending hours in the kitchen. Slice it like a pizza, set out the dipping sauces, and let everyone dig in.
Tips for Beginners
- The second sheet pan is non-negotiable. I tested this both ways, with the pressing pan and without, and the difference is significant. Without it, the top tortilla layer puffs up and the filling shifts around, which means uneven crisping and slices that fall apart. With it, the entire wrap compresses into a tight, cohesive layer that slices cleanly and has that satisfying crunch all the way through. The weight of the second pan forces the tortilla into direct contact with the bottom of the greased pan, which is what creates the crispy base. Don’t skip it.
- Layer in the right order for the best texture. I learned this the hard way after my first batch came out soggy in the middle. The chicken goes down first, so it sits closest to the heat. The cheese goes on top, so it melts down through the filling as it bakes. The corn gets tucked in after the cheese so it doesn’t sit directly on the tortilla base. The fried onions always go on last. If they get buried under warm, wet ingredients, they turn soft and lose their crunch entirely. Getting the order right is what gives you a crunchwrap that holds together and tastes balanced in every bite.
- Drain your corn really well. Excess liquid from canned corn can seep into the tortilla layer during baking and create a soggy spot right in the center of your crunchwrap. I always drain the corn and then press it briefly with a paper towel before adding it. It takes ten seconds and saves the texture entirely.
- Don’t go light on the fried onions. The fried onions are what make this crunchwrap feel special. They add that salty, savory crunch that you can’t get from the chicken or cheese alone, and they hold up beautifully in the oven rather than turning soggy. Be generous — a light sprinkle won’t be enough to taste in every bite. After slicing, I like to add a small handful of extra fried onions right on top of each slice for added crunch.
Sheet Pan BBQ Chicken Crunchwrap
Equipment
- 2 Baking Sheet
Ingredients
- 7 large flour tortillas
- 2 cups shredded rotisserie chicken
- BBQ sauce like Sweet Baby Ray’s
- 1 cup shredded Monterey Jack cheese
- ½ cup canned sweet corn drained
- French’s crispy fried onions
- oil spray or olive oil for crisping
Optional Dipping Sauces
- white queso
- BBQ ranch mix bbq sauce and ranch dressing equal parts
Instructions
- Preheat the oven to 400°F and grease a large sheet pan.
- Lay 5 large flour tortillas across the sheet pan, slightly overlapping to cover the base, with one in the middle.7 large flour tortillas
- Evenly layer shredded rotisserie chicken over the tortillas.2 cups shredded rotisserie chicken
- Drizzle BBQ sauce over the chicken. You can also toss the chicken in the sauce for a saucy bite.BBQ sauce
- Sprinkle Monterey Jack cheese evenly on top.1 cup shredded Monterey Jack cheese
- Add sweet corn and a generous layer of crispy fried onions.½ cup canned sweet corn, French’s crispy fried onions
- Place an additional 2 tortillas on top and fold/press edges to seal into a large wrap. Lightly spray or brush the top with oil.
- Place another sheet pan on top (to press it down during baking).
- Bake for 20–25 minutes until golden and crispy.
- Slice and serve with queso or BBQ ranch (which is equal parts BBQ sauce and ranch, you can also thin it out with water).
Video
Notes
- Press down with a second sheet pan during baking for the crispiest result.
- Layer in order: chicken, cheese, corn, then fried onions last to keep them crunchy.
- Drain the corn well before adding to avoid soggy spots.
- Don’t overfill — you need enough room to fold the edges up and seal tightly.
- Toss the chicken in BBQ sauce before layering for a saucier bite.
- Assemble up to 24 hours ahead and bake fresh for best results.
- Store leftovers in an airtight container in the fridge for up to 3 days.
- Reheat in the oven or air fryer at 375°F to bring back the crispiness. Skip the microwave.
Nutrition
How to Make Sheet Pan BBQ Chicken Crunchwrap Step by Step
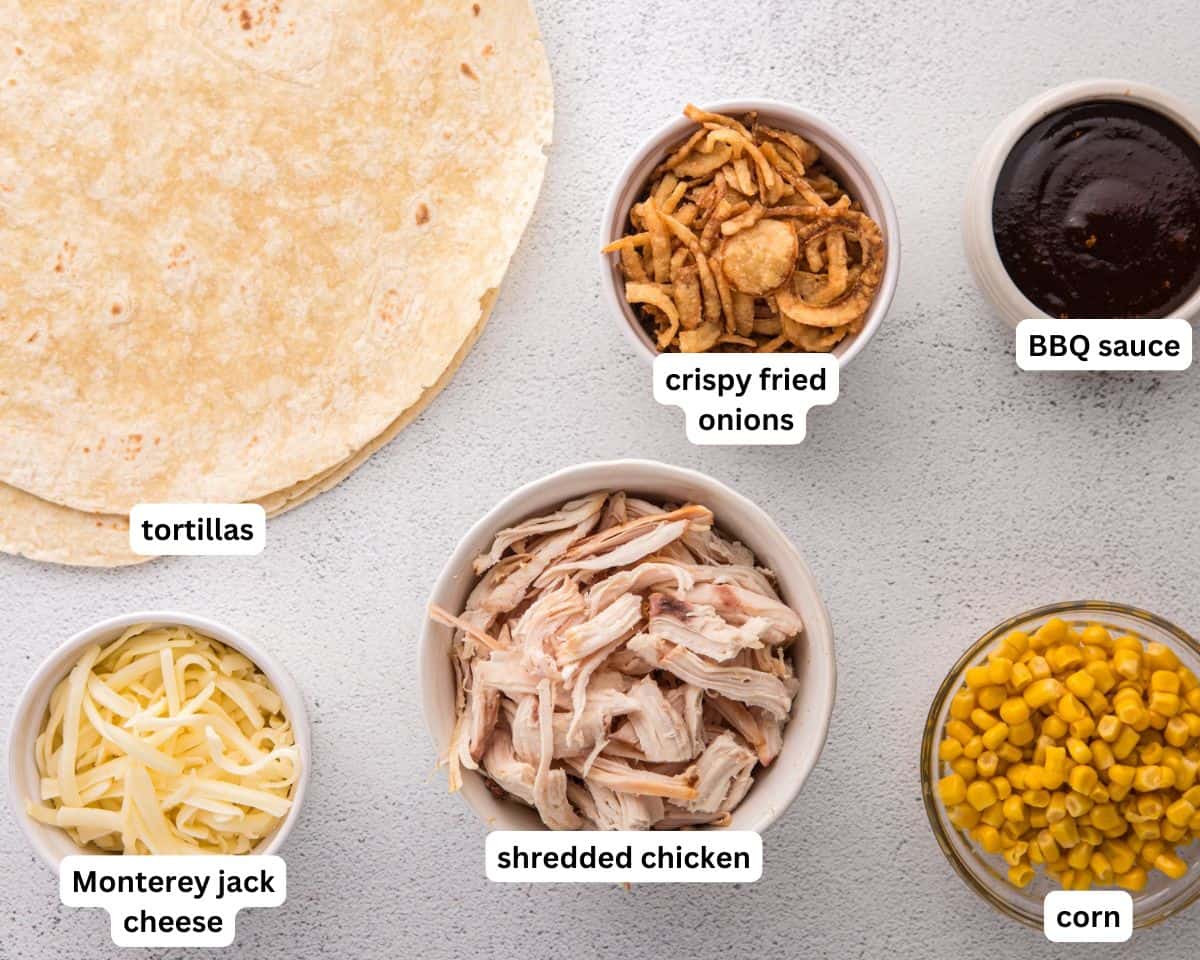
Gather the ingredients and prep your pan: Gather all the ingredients together. Preheat your oven to 400°F. Grease a large rimmed sheet pan generously with cooking spray or brush with olive oil. Don’t skip this step. A well-greased pan is what helps the bottom tortilla layer get golden and crispy rather than sticking and tearing when you slice.
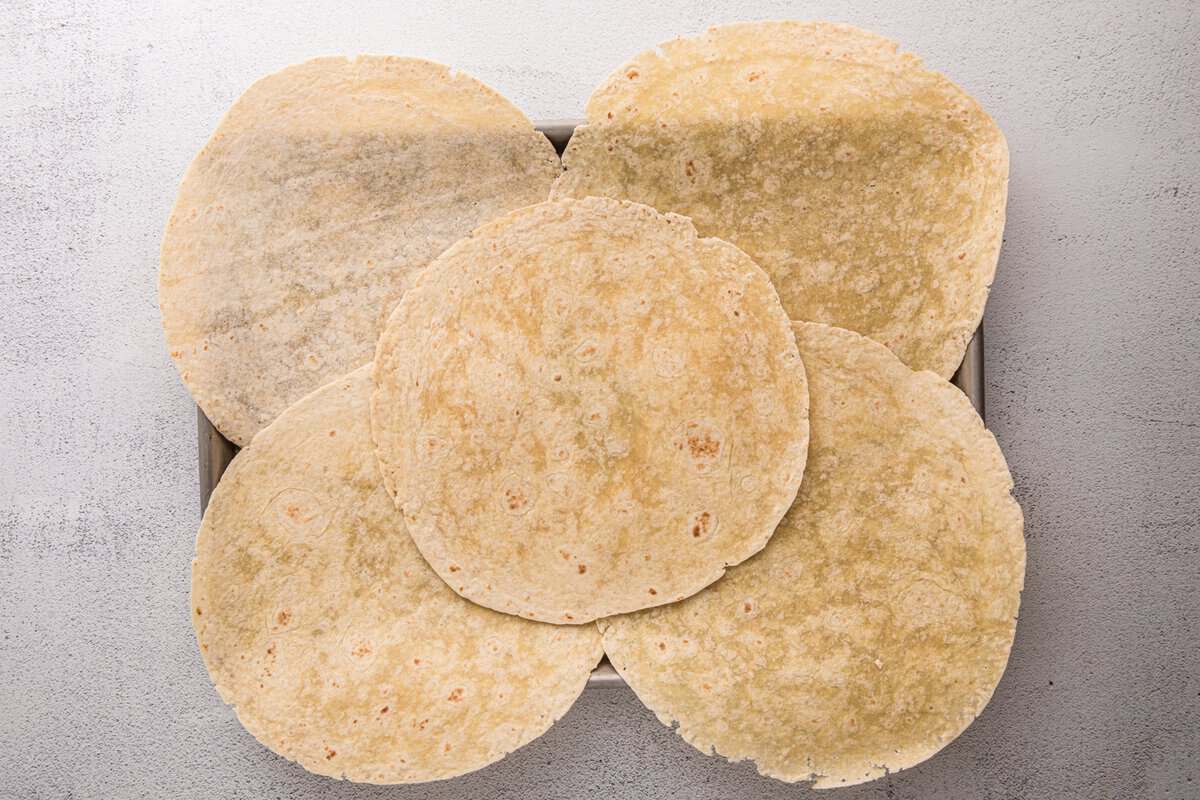
Lay the tortilla base: Arrange 5 of the large flour tortillas across the bottom of the sheet pan, overlapping slightly to cover the entire surface and hang over the edges a bit. Place 1 tortilla in the center to fill any gap in the middle. The tortillas should create a complete layer with no empty spots.
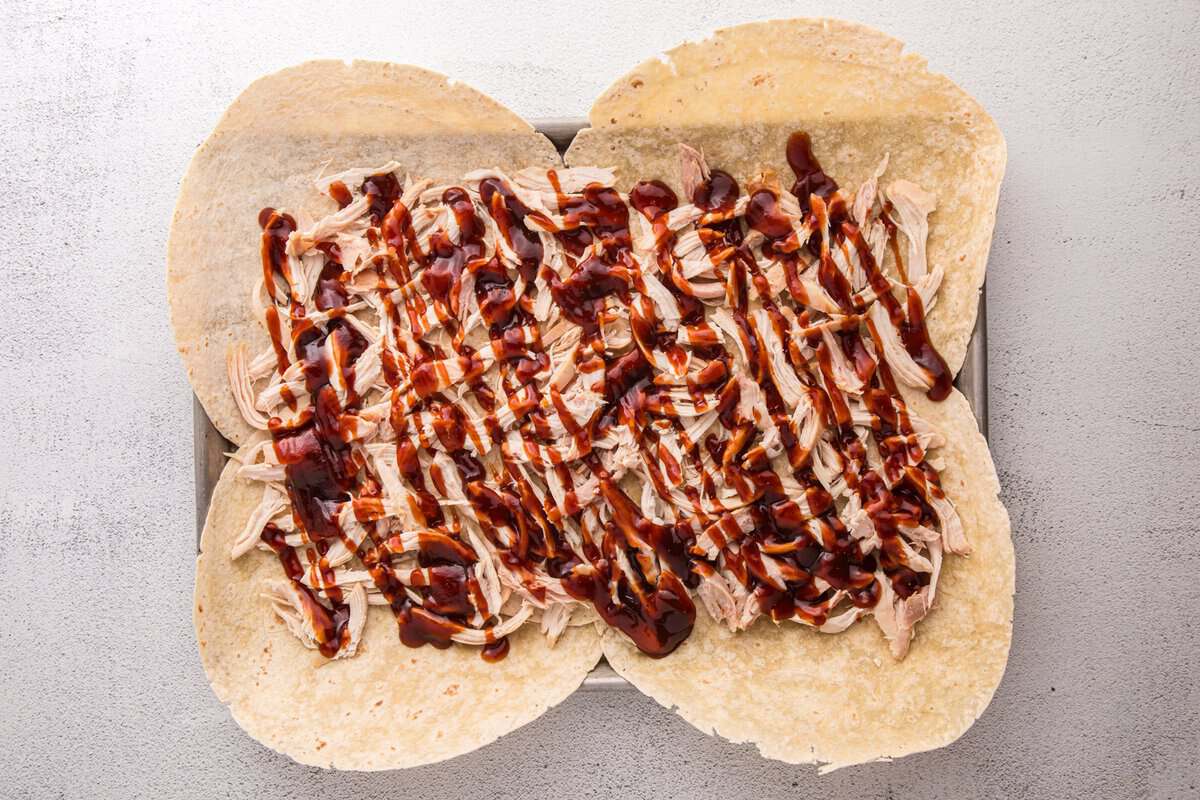
Layer the filling: Spread 2 cups of shredded rotisserie chicken evenly over the tortilla base. For a saucier bite, toss the chicken in BBQ sauce before layering it on. If you prefer a lighter coating, drizzle the BBQ sauce over the top once the chicken is spread on. Either way works.
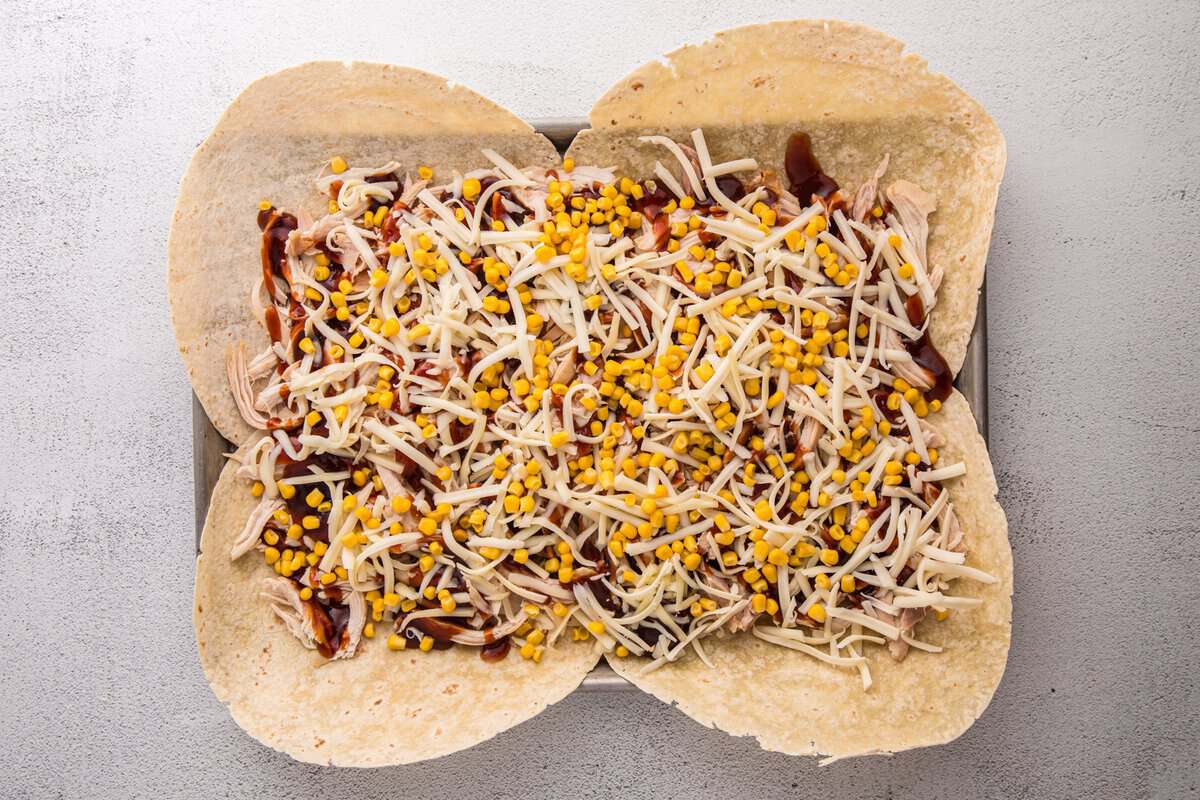
Add the cheese and corn: Sprinkle 1 cup of Monterey Jack cheese evenly over the chicken, then add ½ cup of drained sweet corn.
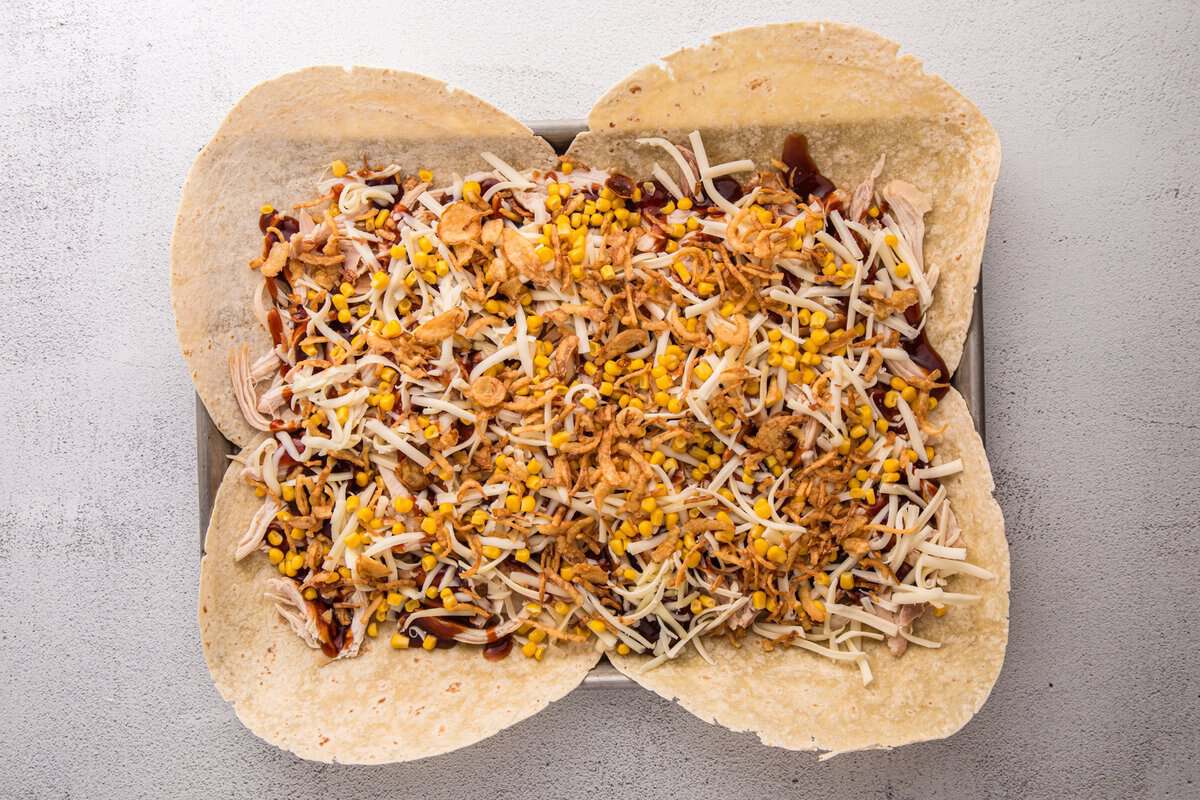
Add the crispy onions: Finish with a generous layer of French’s crispy fried onions. The filling should look full but not overflowing. You want to be able to fold the edges of the tortillas up and over without everything spilling out.
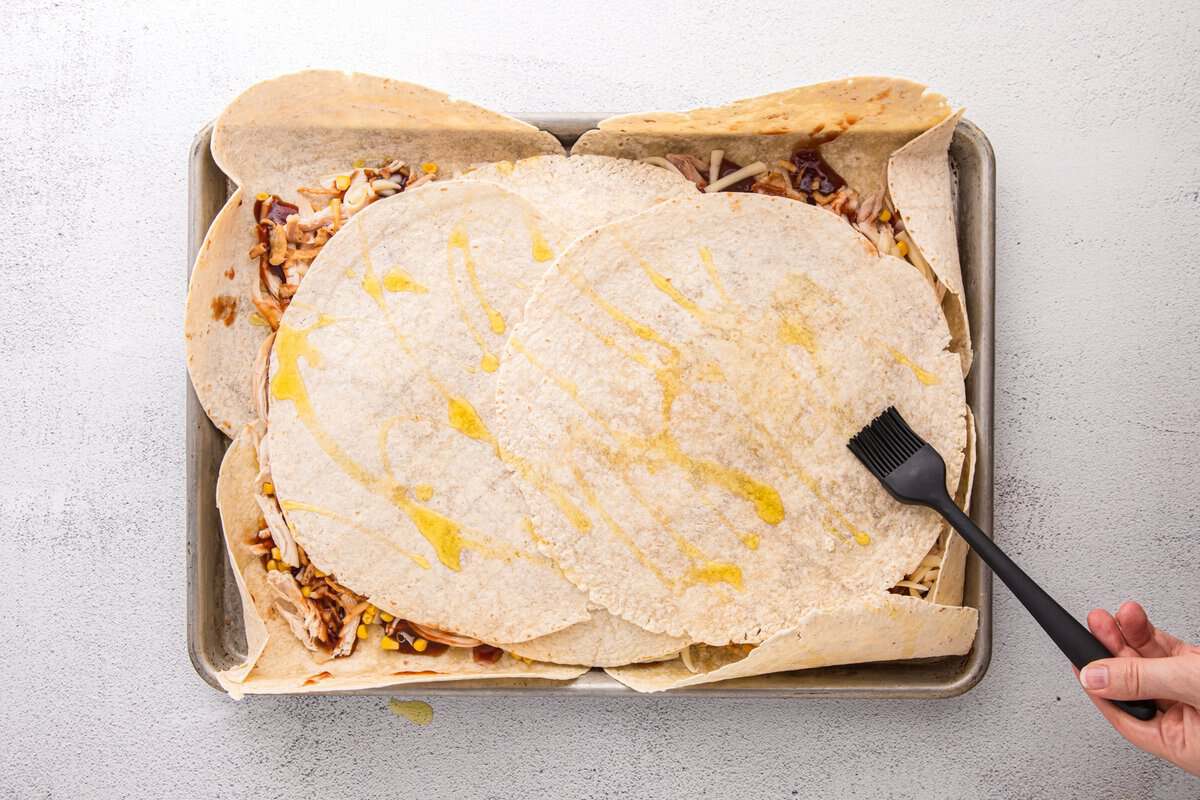
Add the top tortilla layer and fold: Lay the remaining 2 tortillas over the top of the filling to close the crunchwrap. Fold the overhanging edges of the bottom tortillas up and over the top layer, pressing them down to seal everything in. The edges don’t have to be perfect, just snug enough that the filling stays contained during baking. Lightly spray or brush the top with olive oil.
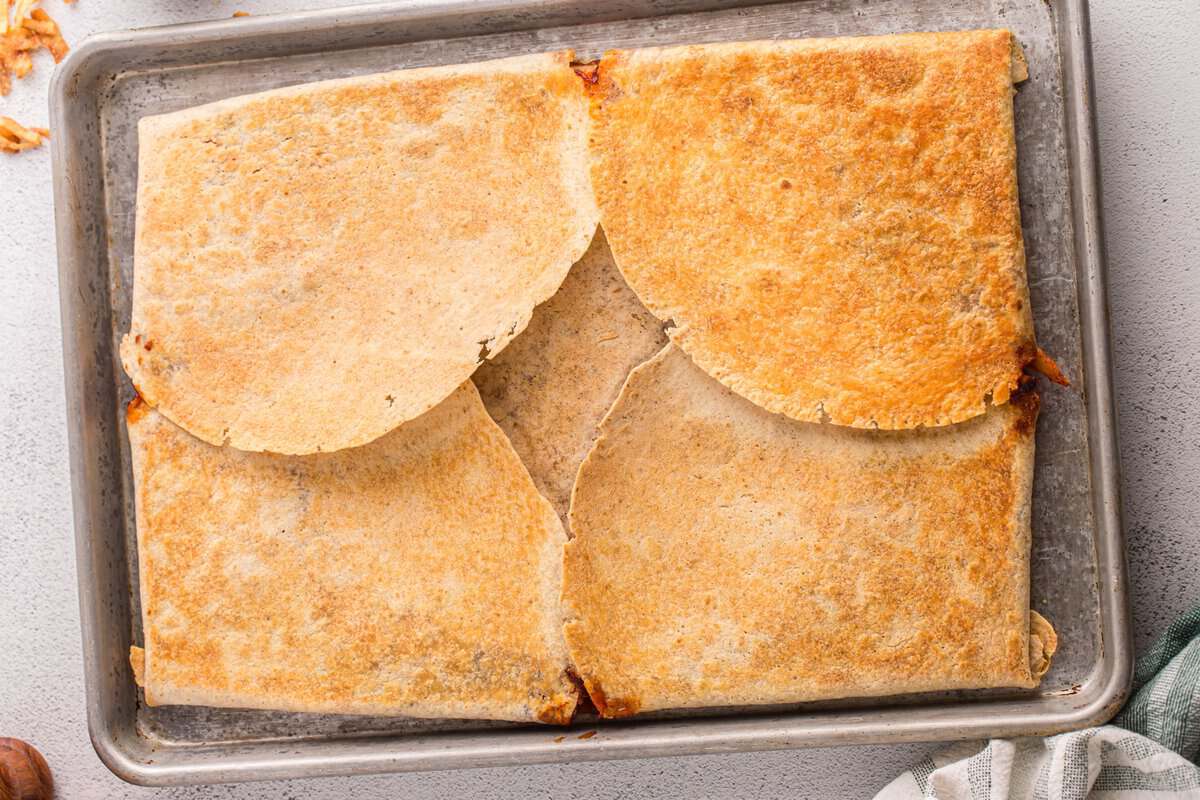
Press and bake: Place a second sheet pan directly on top of the assembled crunchwrap to press it down. This is the step that makes everything crispy and compact. Bake at 400°F for 20–25 minutes, until the top is golden and the edges are visibly crisp and set.
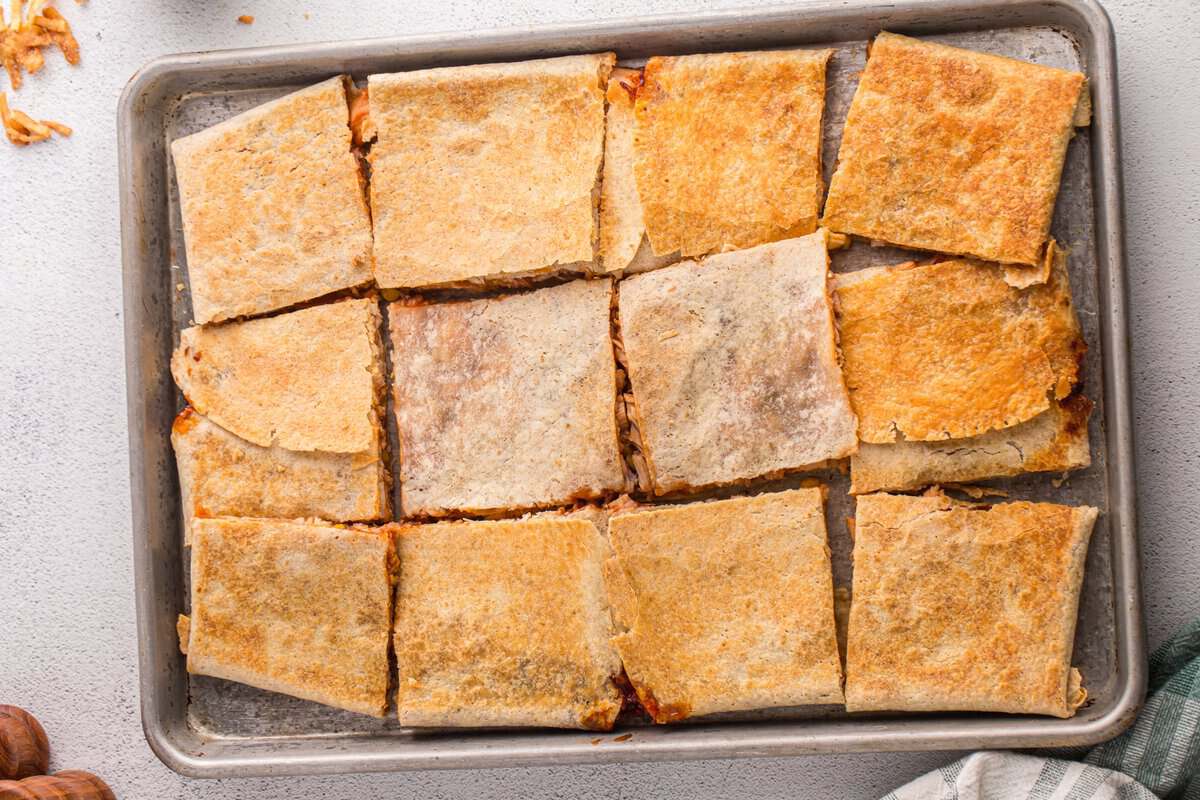
Slice and serve: Let the crunchwrap rest for 2–3 minutes before slicing. This helps it hold together cleanly. Cut into squares or triangles, pizza-style, and serve immediately with BBQ ranch and queso on the side.
Substitutions and Variations
- Chicken: Rotisserie chicken is the easiest option, but canned chicken works in a pinch. Shredded leftover grilled chicken is also great here. For even more BBQ flavor, swap the rotisserie chicken for pulled pork and use a honey BBQ sauce for a smokier, richer version.
- Cheese: Monterey Jack melts beautifully and keeps the flavor creamy and mild. Pepper jack adds a little heat if you want more of a kick. Cheddar gives a sharper, more classic flavor.
- BBQ sauce: Any brand works well here. Use spicy BBQ if you want more heat, honey BBQ for a sweeter finish, or mix honey BBQ with a little hot sauce for a sweet heat combination.
- Fried onions: Be generous with these. They’re what give the crunchwrap its signature texture. If you can’t find French’s crispy fried onions, crushed tortilla chips, or crushed crackers, give a similar crunch.
- Corn: Skip it if you don’t have any on hand. The recipe works great without it. If you do use it, make sure to drain it really well so it doesn’t create any soggy spots.
- Add-ins: Diced purple onion or pickled jalapeños inside the filling add great color and a little heat. A thin layer of refried beans on the tortilla base makes it even heartier.
How to Store and Reheat
Store leftover slices in an airtight container in the fridge for up to 3 days. Let them cool completely before storing so condensation doesn’t soften the tortilla. I don’t recommend freezing this one. The tortilla texture changes significantly after freezing and thawing, and the fried onions lose all their crunch. It’s best enjoyed fresh.
Reheat
To reheat, the oven or air fryer is your best option. The air fryer at 375°F for 4-5 minutes brings back almost all of the original crispiness. The oven at 375°F works well too. Just give it 8-10 minutes. Skip the microwave if you can. It softens the tortilla and makes the fried onions chewy.
Make Ahead
If you want to get ahead, you can fully assemble the crunchwrap on the sheet pan, cover it tightly with plastic wrap, and refrigerate it for up to 24 hours before baking. Pull it out while the oven preheats and bake as directed. It’s a great option for parties or game days when you want most of the work done in advance.
Serving Suggestions
This crunchwrap works for just about any occasion. I serve it as a fun weeknight dinner sliced into squares on a big board with homemade ranch and white queso on the side. It’s also one of my favorite things to bring out for game days or casual get-togethers. If I’m hosting, I’ll set out taco cups and animal-style fries to keep everyone satisfied. A bowl of loaded cowboy queso with tortilla chips on the side rounds out the spread perfectly. For a lighter snack situation, I’ll slice it into smaller pieces and let everyone graze. It works just as well cut into thin strips as it does in big squares. I always put out pickled jalapeños, diced purple onion, and extra fried onions so everyone can customize their slice however they want. A simple green salad or some sliced fruit on the side keeps things balanced when I’m serving it as a full dinner. It’s one of those recipes that fits the moment, whatever that moment happens to be.
More Fun Shareable Recipes
- Chicken Smash Tacos: Crispy smashed chicken with bold toppings served three ways. Great for nights when you want something fun and customizable on the table.
- Flamin’ Hot Grilled Cheese Burrito: Crispy grilled cheese on the outside, seasoned beef and taco rice on the inside, finished with Flamin’ Hot Fritos for an outrageous crunch. It’s the same fun, over-the-top handheld energy as this crunchwrap.
- Bean and Cheese Burritos: Creamy seasoned refried beans and melty cheese wrapped in a soft tortilla, then crisped in a skillet until golden. A simple, satisfying dinner that comes together fast.
- Trash Can Nachos: Layers of chips, seasoned beef, black beans, and melty queso built inside a can and flipped out so every single chip gets loaded. A total showstopper for game days and casual get-togethers.
More sheet pan meals we love
The post Sheet Pan BBQ Chicken Crunchwrap appeared first on The Cookie Rookie®.


0 Commentaires